Sanding Mandrels – Roll Your Own

Sanding mandrels are very useful in grinding, rounding, and sanding the upper inside lips of stone vases. The transition between a flat surface and a core-drilled hole is usually sharp, rough, or even damaged. The mandrel on a die grinder allows you to shape, sand and polish this area.  Presented below is how to make and use your own sanding mandrels.

I’ve broken the article into five parts:  The Mandel, Sanding Material, the Crimpers, Construction, and Usage

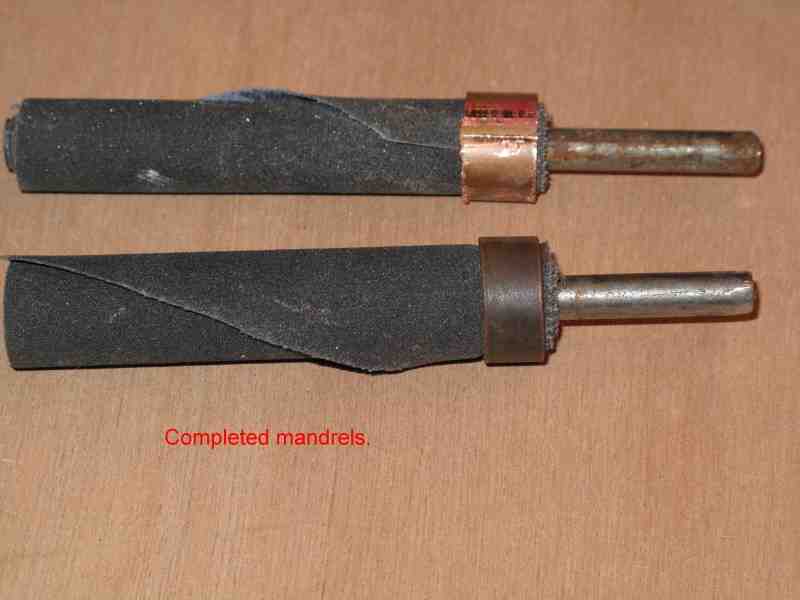
This is the way that I make ¼ inch sanding mandrels for die grinders: I start off with ¼ ” round stock and cut a slot down the center to hold the sanding belt in place. Then I insert the belt end and tightly roll the belt on to the mandrel, stopping when the diameter is the same as that of the crimping ring. I then crimp the ring onto the sanding belt material.

The Mandrel

  • For 3″ belting cut the slot 2 ½” long. Rip down the center of the rod with a hacksaw or better yet a metal cutting band saw, with a table. If using a band saw leave the rod long and cut the slot before cutting the mandrel to length. If you are forced to cut short rods use vice grips to hold the mandrel, as the rod can be flipped up and into the saw blade. This is a safety issue, so keep your hands clear.
  •  

The Sanding Material

  • Silicon carbide grit. Aluminum oxide will not work on hard stone, but may work on limestone, marble,or other soft stone.
  • I use cloth backed belting, with bonded grit. D or X weight.
  • Wet/dry rating. I have some old sanding belt that immediately falls apart when used wet, it is not wet dry.
  • 3″ width. I have used 2″ also but when the roll wears down the copper crimp ring is into your work. Longer than 3″ would be ok but may wobble too much, and bend the mandrel.
  • Where do you get 3″ silicon carbide belting? Rock and lapidary shops, but the price is high. Lapidary mail order stores. E-bay, has new and surplus belting and belts, just cut the belt and roll your own. Custom belting manufacturers “Custom Sanding Belts. Com” You may even find some used belts that have unworn areas on the edges. It is easy to tear or cut a belt length wise to your desired width.  

The Crimp Ring and Crimper

  • I first started out using a crimper used for repairing welding hoses. The problem with this crimper: The largest diameter roll was only ½”. Such a small diameter roll only has 5 ½” of belting on it and wears out quickly.
  • The PEX crimping system is what I now use. It is designed to crimp plastic water tubing to fittings. The crimper set comes with dies for 3/8″, ½”, 5/8″, ¾” and 1″ tubing. It sells at Lowes for about $90. Cheaper units, that use a vice or bolts to tighten the ring are also available for about $25. Rental shops and plumbers also have these crimping tools. If you roll up a group of mandrels and slide the rings over the belting, they can be transported to someone who can crimp them for you.
  • Copper PEX rings sell for about $.25 each. They are widely available.
  • When using 120 grit D weight belting, this is diameter of the roll and how much belting I will use. ½” ring: 5/8″ diameter roll w/ 7 ¼” of belting. 5/8″ ring: ¾” diameter roll w/ 11 ½” of belting. ¾” ring: 7/8″ diameter roll w/ 17 ¾” belting. 1″ ring: 11/8″ diameter roll w/ 29 ½” of belting.

How to Build

  • Cut the belting using a small pair of tin snips or an old pair scissors.
Cut and slot ¼” rod.
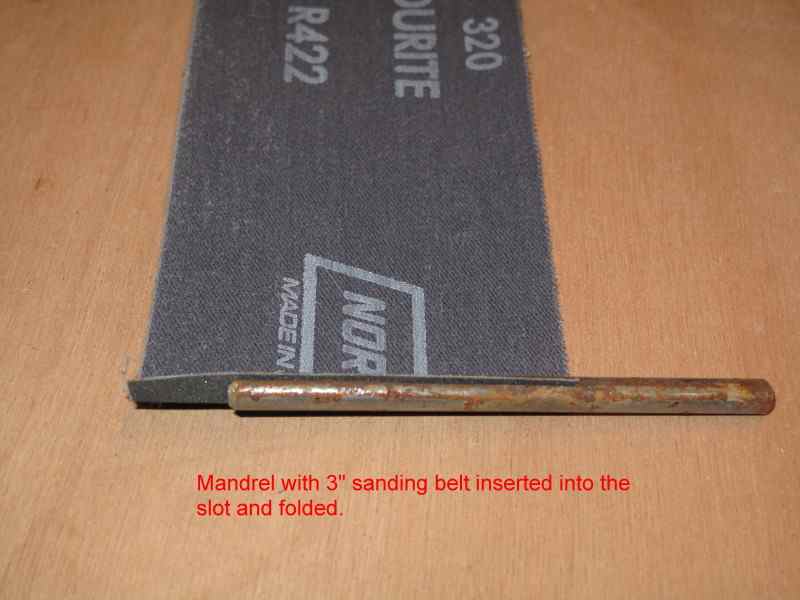
Place square cut end of sanding belt into slot of mandrel.
Make sure that it is placed so that the rotation is correct for the die grinder and the grit is up. Fold and bend the belting at the slot.
Slide the ring over the grinder end of the mandrel.
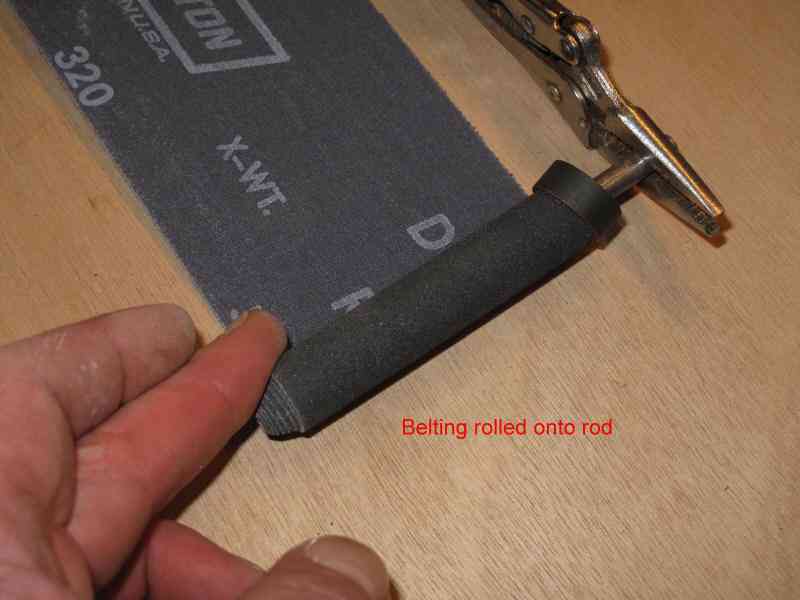
Clamp the grinder end of the mandrel with the vise grips trapping the ring. Tightly roll the belting until the roll equals the inside diameter of the ring. If the belting rolls crooky, loosen and then straighten while twisting the mandrel. While twisting the roll and vicegrips, slide the ring over the belting, enough to contain the belting. Crimp the ring.
Take the tin snips and trim the belt from the ring diagonally to remove the flap that sticks out.

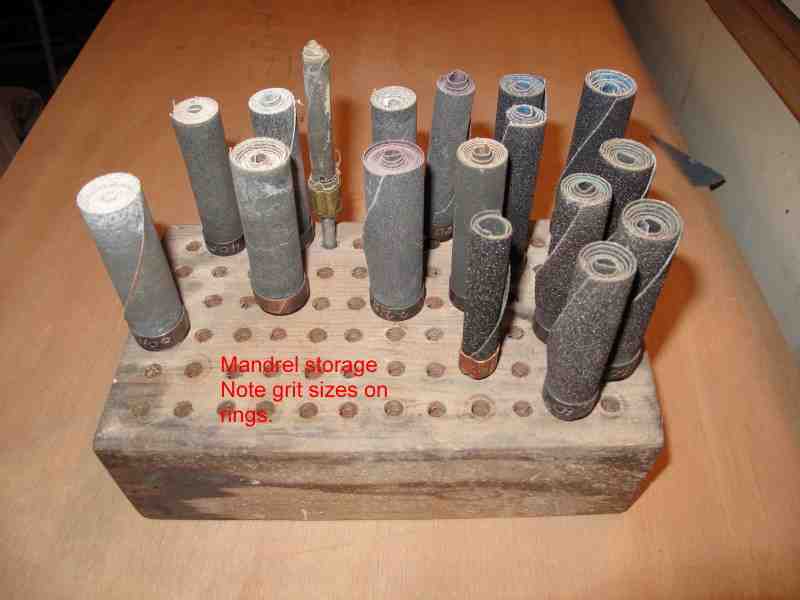
  • Use an electric engraving tool to label the grit size on each ring.
  • Color-coding will also work. File or grind any burs on the mandrel that will impede chucking into the die grinder.

Using the Sanding Mandrel.

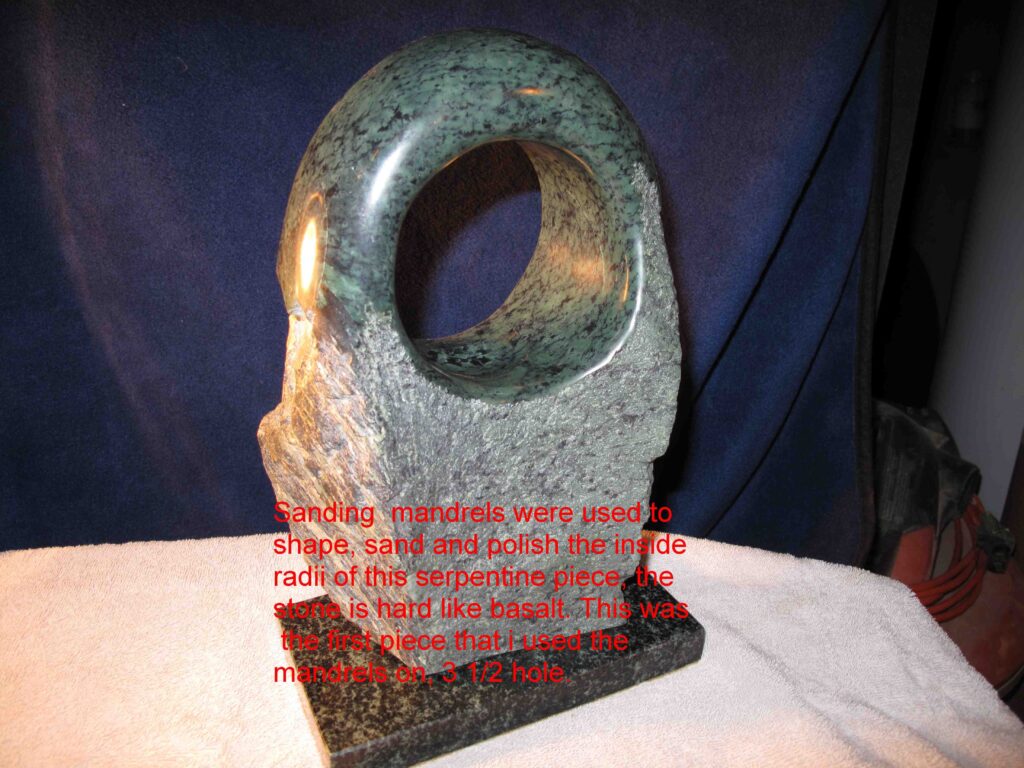
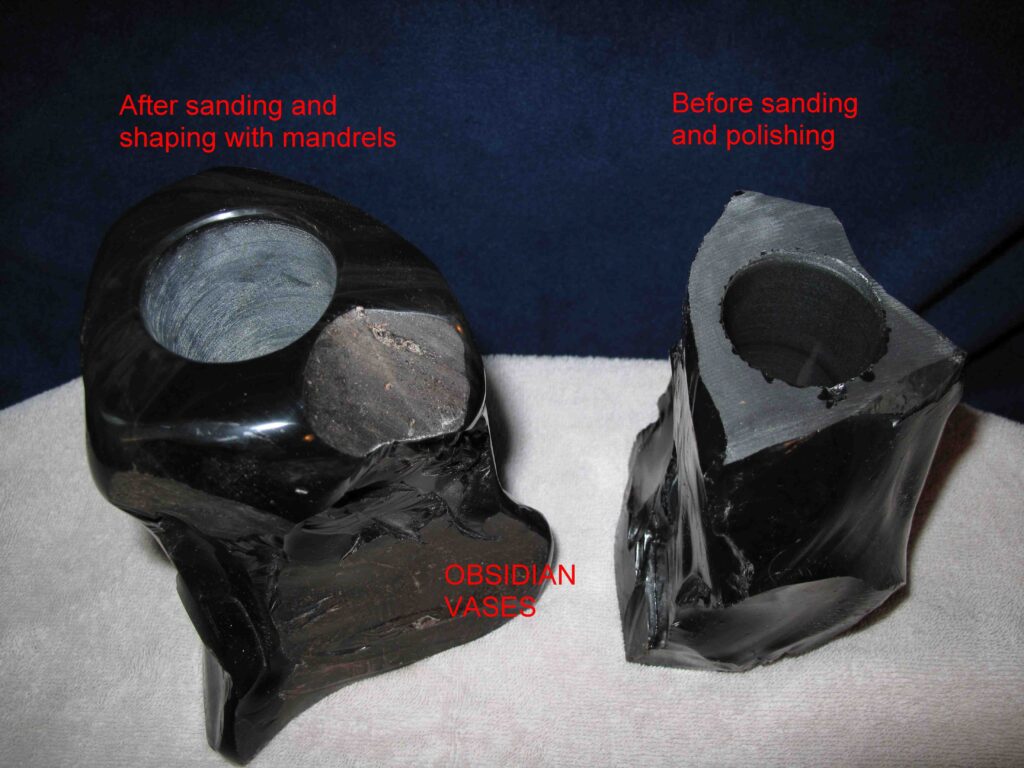
I use the sanding mandrels to grind, round, and sand the upper inside lips of stone vases. The transition between the flat top and the core-drilled hole is usually sharp and rough or even damaged. The mandrel on a die grinder allows me to shape, sand and polish this area.
  • ALWAYS use an air pressure regulator on the die grinder to control the mandrels speed. Un-supported overspeed will bend the mandrel. Over speed will also cause the abrasive to be torn from the belt’s cloth backing faster, especially when using courser grits.
  • Try to support the mandrel against your work piece when starting the die grinder.
  • I use all of my mandrels wet. They last longer and eliminate the dust.
  • When the belt and the abrasive wears out on the top layer, I use the tin snips to cut away the worn belting. Start at the band and cut along the band and then diagonally to the end, leaving new abrasive. Continue using this method until the last rap.
  • When the roll is worn out, cut off the ring and re-use the mandrel.
Sanding Obsidian Vases. Before on right, after sanding on left.
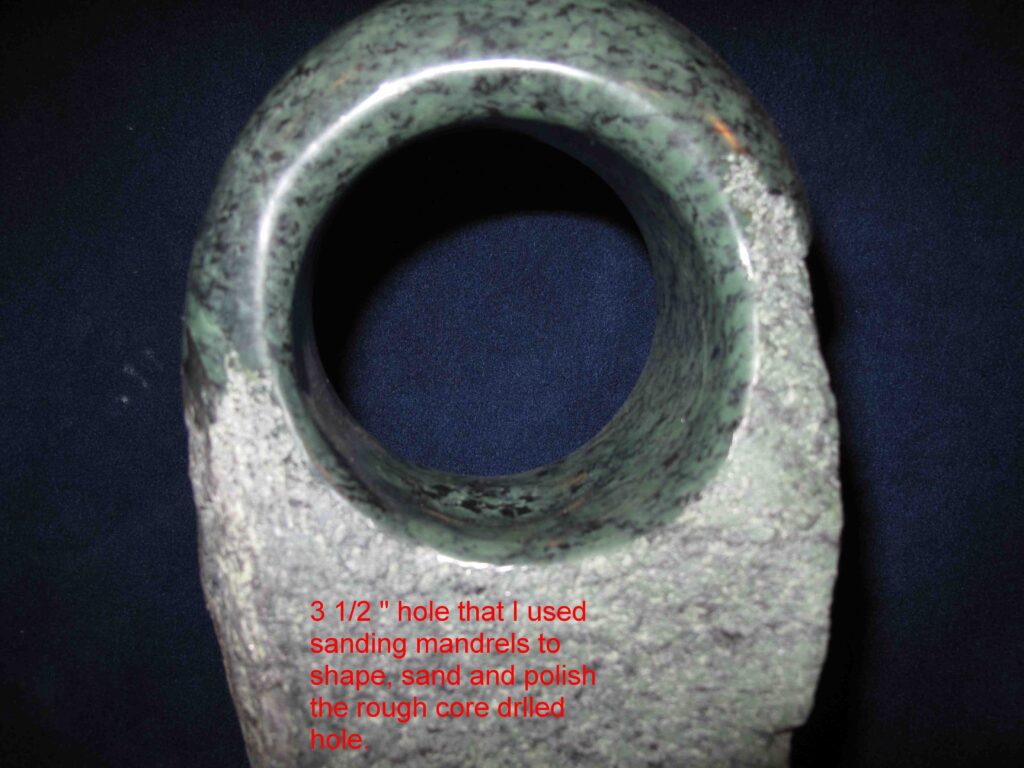
3 – 1/2″ core drilled hole, then sanded with Mandrels to shape and polish.
First piece that I used sanding mandrels to shape, smooth and polish. Serpentine is hard like basalt.

Related:

Share this:

Log In

We need some kind of descriptive text here.